注意
現在在 Astro 做多語系我會建議改用 I18n for Astro (@astrolicious/i18n),不建議用本文的方法了。
Astro 可以做 i18n 的套件有好幾個,看完介紹後挑了個比較喜歡的 Paraglide 來做,而且還有 VSCode 套件可以搭配使用,做翻譯很舒服。
安裝 Paraglide
初始化 Paraglide 設定:
npx @inlang/paraglide-js init

# ❯ Which languages do you want to support?
# en, zh-TW

# 中間的都按 Enter

# Do you want to add the Ninja Github Action for linting translations in CI?
# No
然後修改 project.inlang/settings.json,把 sourceLanguageTag 預設語言改成 zh-TW,languageTags 內的繁體中文也改成 zh-TW 格式:
{
  ...
  "sourceLanguageTag": "zh-TW",
  "languageTags": [
    "en",
    "zh-TW"
  ],
  ...
}
以及 messages/zh-TW.json 也要改名成 messages/zh-TW.json。
這裡提到的 messages 資料夾下就是翻譯文字的內容,每個語言一個 JSON 檔。
安裝 Paraglide Astro:
yarn add @inlang/paraglide-astro然後在 astro.config.ts 裡註冊:
import { defineConfig } from 'astro/config'
import paraglide from '@inlang/paraglide-astro'

export default defineConfig({
  site: 'https://my-site.dev',
  integrations: [
    paraglide({
      project: './project.inlang',
      outdir: './src/paraglide',
    }),
  ],
  i18n: {
    locales: [
      { codes: ['zh-TW'], path: 'zh-tw' },
      'en',
    ],
    defaultLocale: 'zh-tw',
  },
})
目前 Astro 支援將語言 Code 和網址路徑分開設定,但如果這樣設定的話,會有不同的設定方式:
| 對應路徑 | 對應 Astro i18n 的選項 |
|---|---|
messages/zh-TW.json | codes,語言 Code 代號 |
src/pages/zh-tw/... | path,網址路徑 |
還有我平常有使用 EditorConfig,這邊附上設定檔:
.editorconfig
root = true

[*]
charset = utf-8
indent_style = space
indent_size = 2
end_of_line = lf
insert_final_newline = true
trim_trailing_whitespace = true

[messages/*]
insert_final_newline = false
trim_trailing_whitespace = false

[project.inlang/*]
insert_final_newline = false
trim_trailing_whitespace = false
安裝 Sherlock VSCode 套件
Paraglide 有推出搭配使用的 VSCode 套件 Sherlock,點擊安裝 Sherlock VSCode 套件。
接著增加 VSCode 設定,確保此專案中都可以看到 Sherlock 的提取提示選項,以及關閉不需要的提示訊息:
.vscode/settings.json
{
  "editor.lightbulb.enabled": "onCode",
  "sherlock.appRecommendations.ninja.enabled": false
}
多語系資料夾結構
如果沒有特別的需求,通常比較通用的多語系資料夾結構是這樣的,預設語言可以不加上語言前墜:
src
├── pages
│   ├── index.astro // 預設語言
│   ├── about.astro // 預設語言
│   └── en
│       ├── index.astro // 英文
│       └── about.astro // 英文
通常版型都會做在預設語言的頁面裡,需要翻譯的部分可以透過後續篇章介紹的翻譯文字來做,因此其他語言就可以直接引用該頁面:
---
import Page from '@/pages/about.astro'
---

<Page />
而如果是需要 SSR 的頁面,需要手動加上 export const prerender = false:
---
import Page from '@/pages/posts/[slug].astro'

export const prerender = false
---

<Page />
當然這是排版完全相同的情形,如果其他語言有較多更改的地方,可以選擇直接複製預設語言的版型出來改比較快。
翻譯文字
記得啟動一下 Astro 的 Dev Server。
然後準備好需要翻譯的文字,並在上方引入 Paraglide 多語系的模組:
---
import * as m from '../paraglide/messages.js'
---

<h1>關於我們</h1>
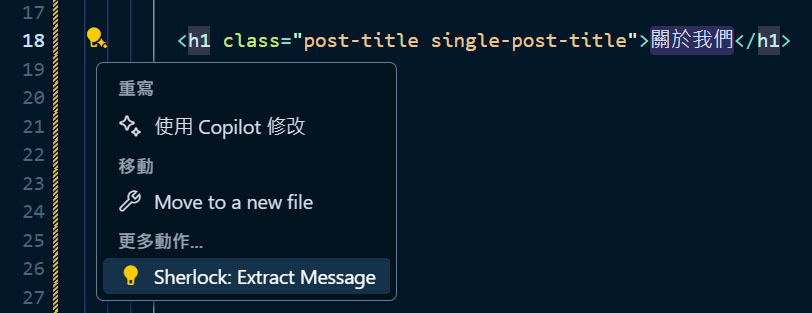
使用方式很簡單,框選需要翻譯的文字後,點左邊出現的小燈泡按鈕,最下面出現的 Sherlock: Extract Message 選項,就會建立一調新的翻譯項目:

接著輸入翻譯項目的 key,比如 about_us,注意 Sherlock 會將標點符號等擋掉或轉換成底線,然後選擇要替換的文字。
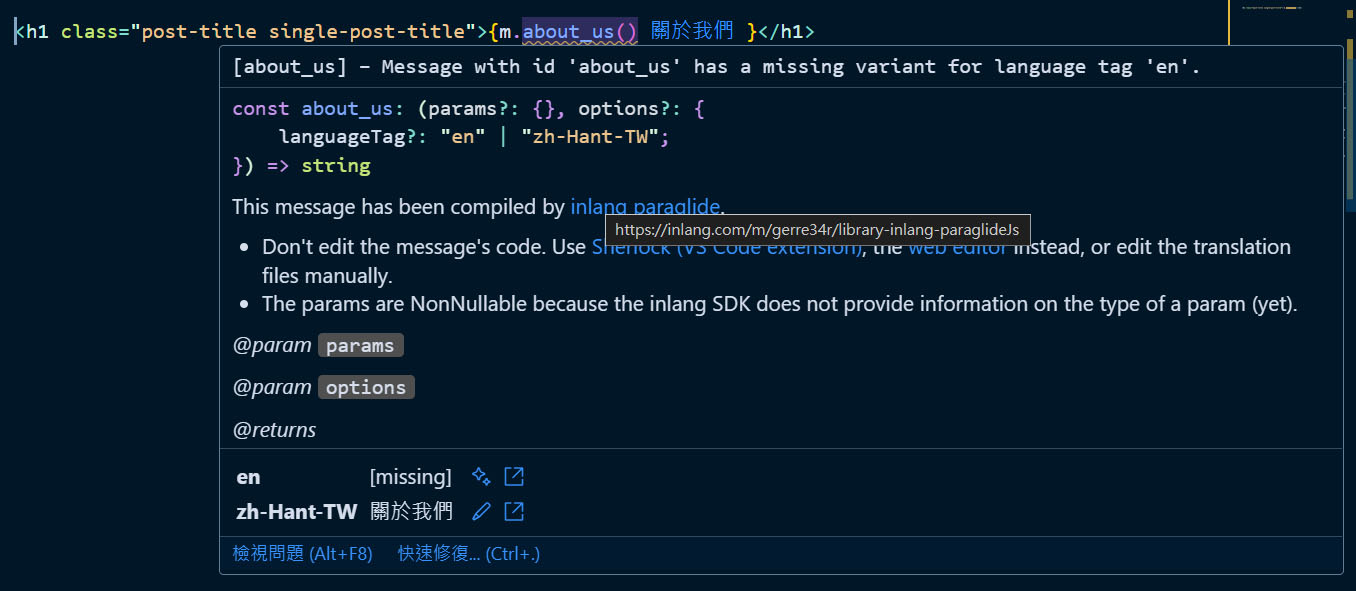
現在就可以看到 m.about_us() 右側就會出現對應的翻譯文字了~ 如果現在鼠標移動到 m.about_us() 上,就可以看到其他語言的翻譯文字,如果上面出現 [missing] 也可以點右邊的閃光來讓 AI 自動產生翻譯文字:

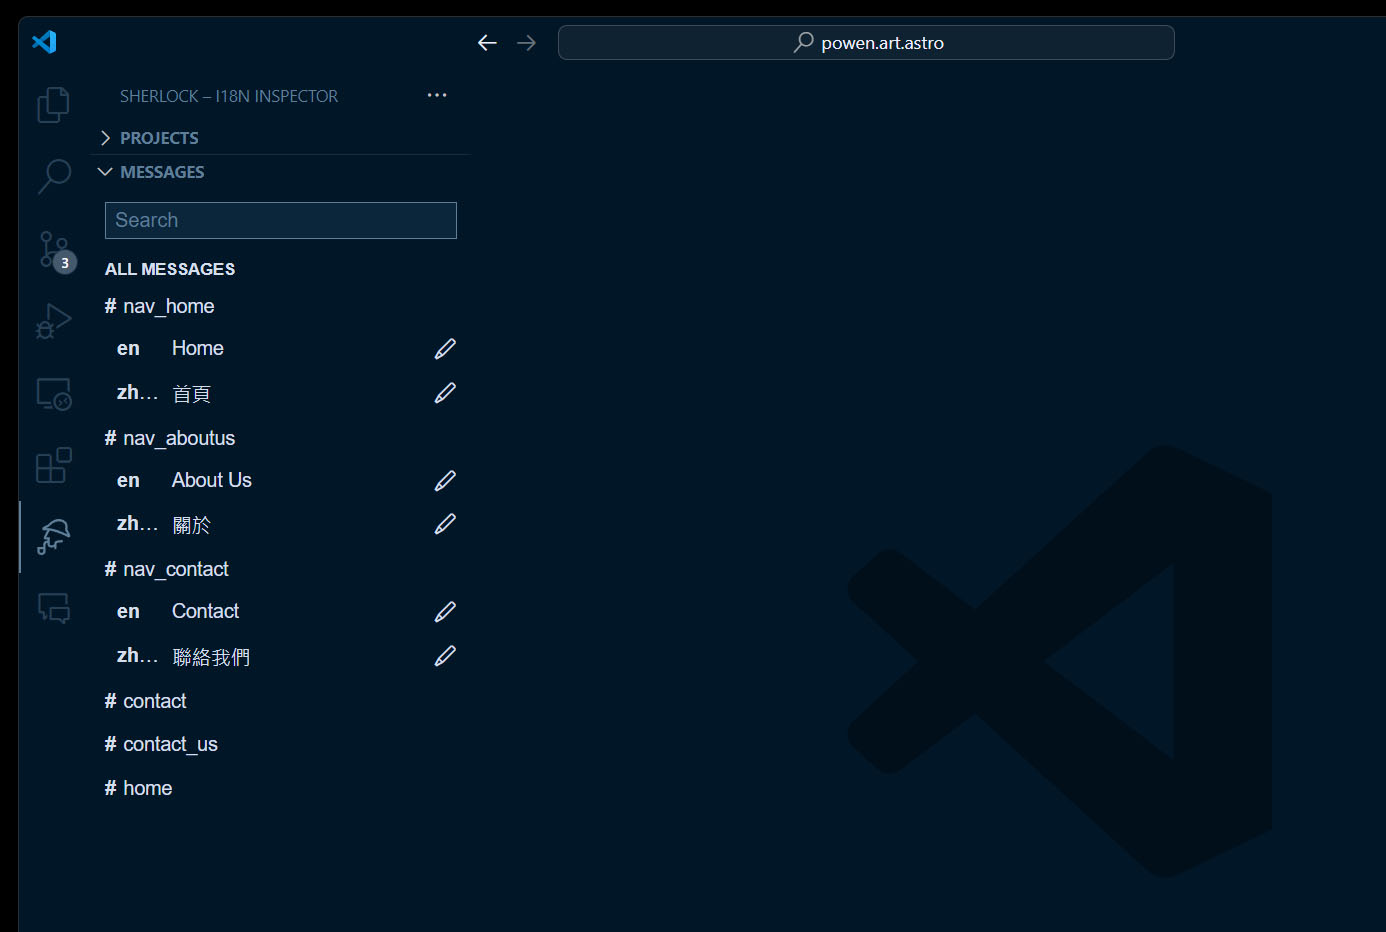
而在左側 Sherlock 的 i18n inspector 也可以查看所有的翻譯文字:

語系設定虛擬模組
在後面要自訂語系的時候,會有缺少一些變數以及需要取得 Astro 的 config 選項,因此這邊我們建一個 Astro Plugin,裡面用 Vite Plugin 產生一個虛擬模組 astro:i18n:config 來引入需要的 config 選項:
src/i18n/config-integration.ts
import type { AstroIntegration, AstroConfig } from 'astro'
import type { Plugin } from 'vite'

export interface I18nConfigOptions {
  locales: Record<string, { text: string, code?: string }>
}

export interface I18nConfig {
  langCodeMap: Record<string, string>
  langTextMap: Record<string, string>
}

interface I18nConfigContext {
  astroConfig: AstroConfig
  i18nConfig: I18nConfig
}

const VIRTUAL_MODULE_ID = 'astro:i18n:config'
const RESOLVED_VIRTUAL_MODULE_ID = `\0${VIRTUAL_MODULE_ID}`

function vitePluginI18nConfig(context: I18nConfigContext): Plugin {
  const { astroConfig, i18nConfig } = context

  const { site } = astroConfig
  const { langCodeMap, langTextMap } = i18nConfig

  const i18nInternal = { site }

  return {
    name: 'astro:i18n:config',
		enforce: 'pre',
    resolveId(id) {
      if (id === VIRTUAL_MODULE_ID) {
        return RESOLVED_VIRTUAL_MODULE_ID
      }
    },
    load(id) {
      if (id === RESOLVED_VIRTUAL_MODULE_ID) {
        return `
          export const langCodeMap = ${JSON.stringify(langCodeMap)}

          export const langTextMap = ${JSON.stringify(langTextMap)}

          export const i18nInternal = ${JSON.stringify(i18nInternal)}
        `
      }
    },
  }
}

export default function (options: I18nConfigOptions): AstroIntegration {
  const i18nConfig = {
    langCodeMap: {},
    langTextMap: {},
  } as I18nConfig

  Object.entries(options.locales).forEach(([locale, { text, code }]) => {
    i18nConfig.langCodeMap[locale] = code || locale
    i18nConfig.langTextMap[locale] = text
  })

  return {
    name: 'i18n-config',
		hooks: {
			'astro:config:setup': ({ config: astroConfig, updateConfig }) => {
        updateConfig({
          vite: {
            plugins: [
              vitePluginI18nConfig({
                astroConfig,
                i18nConfig,
              })
            ],
          },
        })
      },
    },
  }
}
然後為虛擬模組 astro:i18n:config 定義型別設定:
src/i18n/client.d.ts
declare module 'astro:i18n:config' {
  type AstroConfig = import('astro').AstroConfig
  type I18nConfig = import('./config-integration').I18nConfig

  export const langCodeMap: I18nConfig['langCodeMap']
  export const langTextMap: I18nConfig['langTextMap']
  export const i18nInternal: {
    site: AstroConfig['site']
  }
}
最後在 astro.config.ts 引入套件即可,這邊需要注意,locales 的 key 需要和 project.inlang/settings.json 的 languageTags 完全對應,包含大小寫都要一致:
import { defineConfig } from 'astro/config'
import i18nConfig from './src/i18n/config-integration'

export default defineConfig({
  integrations: [
    // ...
    i18nConfig({
      locales: {
        'zh-TW': { text: '繁體中文', code: 'zh-Hant-TW' },
        en: { text: 'English' },
      },
    }),
  ],
})
之後只要引入 astro:i18n:config 就可以使用了:
import { ... } from 'astro:i18n:config'HTML Lang Code
Paraglide 安裝完成後,需要先在 Layout 裡新增語言的 lang 等 HTML 屬性。但剛才設定的 zh-TW 其實並不是正規的 ISO 語言格式,繁體中文其實要使用 zh-Hant-TW,因此這邊我們自訂一個 htmlLangCode() 函數來做轉換:
src/i18n/html.ts
import { languageTag } from '../paraglide/runtime.js'
import { langCodeMap } from 'astro:i18n:config'

export function htmlLangCode() {
  return langCodeMap[languageTag()] || languageTag()
}
然後就可以在 <html> 中增加正規的 ISO 語言格式了:
src/layouts/Layout.astro
---
import { htmlLangCode } from '@/i18n/html'
---

<!doctype html>
<html lang={htmlLangCode()} dir={Astro.locals.paraglide.dir}>
  <slot />
</html>
多語系輔助函數
目前跟多語系相關的輔助函數有:
astro:i18n:Astro 核心的產生多語系網址輔助函數astro:i18n:config:自訂的 Astro 多語系輔助函數和變數paraglide/runtime.js:Paraglide 的多語系輔助函數
但還有缺一些東西,就自己寫吧,開一個 src/i18n/linking.ts:
import { getAbsoluteLocaleUrl, getRelativeLocaleUrl } from 'astro:i18n'
import { i18nInternal } from 'astro:i18n:config'
import { availableLanguageTags, languageTag, sourceLanguageTag } from '../paraglide/runtime.js'
import type { AvailableLanguageTag } from '../paraglide/runtime.js'

export type AbsolutePathname = `/${string}`

interface AlternateLocale {
  locale: AvailableLanguageTag
  href: string
}

export function localizePathname(pathname: AbsolutePathname, locale?: AvailableLanguageTag) {
  locale = locale || languageTag()
  if (locale === sourceLanguageTag) {
    return pathname
  }
  return getRelativeLocaleUrl(locale, pathname)
}

export function localizeUrl(pathname: AbsolutePathname, locale?: AvailableLanguageTag) {
  locale = locale || languageTag()
  if (locale === sourceLanguageTag) {
    const { site } = i18nInternal
    return `${site || ''}${pathname}`
  }
  return getAbsoluteLocaleUrl(locale, pathname)
}

export function unlocalizedPathname(pathname: string) {
  const homeLocalePath = getRelativeLocaleUrl(languageTag(), '/')
  return (
    pathname.replace(
      homeLocalePath,
      homeLocalePath.endsWith('/') ? '/' : ''
    ) || '/'
  ) as AbsolutePathname
}

/**
 * Get the available alternate locales for generate `<link rel="alternate">` tags.
 */
export function availableAlternateLocales(requestPathname: string): AlternateLocale[] {
  const pathname = unlocalizedPathname(requestPathname)

  return availableLanguageTags
    .filter(locale => locale !== languageTag())
    .map(locale => ({
      locale,
      href: localizeUrl(pathname, locale),
    }))
}
最後手動把專案內所有的網址,都替換成自動加上當前語系的網址,比如 /about/ 替換成 localizePathname('/about/'):
---
import { languageTag } from '../paraglide/runtime.js'
import { localizePathname } from '../i18n/linking'
---

<a href={localizePathname('/about/')}>{m.about()}</a>
語系選單
在 src/i18n/ui.ts 裡寫個產生語系選單內容的輔助函數:
import { unlocalizedPathname, localizePathname } from './linking'
import { languageTag } from '../paraglide/runtime.js'
import type { AvailableLanguageTag } from '../paraglide/runtime.js'
import { langTextMap } from 'astro:i18n:config'

export interface LanguageSelectorItems {
  current: string
  items: {
    href: string
    label: string
    active: boolean
  }[]
}

export function languageSelectorItems(requestPathname: string): LanguageSelectorItems {
  const pathname = unlocalizedPathname(requestPathname)

  return {
    current: langTextMap[languageTag()],
    items: (Object.keys(langTextMap) as AvailableLanguageTag[]).map(locale => ({
      href: localizePathname(pathname, locale),
      label: langTextMap[locale],
      active: locale === languageTag(),
    })),
  }
}
在 Layout 中做一個下拉選單:
---
import { languageSelectorItems } from '../i18n/ui'

const pathname = new URL(Astro.request.url).pathname
const langSelector = languageSelectorItems(pathname)
---

<div>
  <button type="button">
    <i class="fas fa-globe"></i>
    {langSelector.current}
  </button>

  <ul class="dropdown">
    {langSelector.items.map(({ href, label, active }) => (
      <li class={active && 'current-menu-item'}>
        <a href={href}>{label}</a>
      </li>
    ))}
  </ul>
</div>
Alternate 其他語系網址
使用上面已經寫好的 availableAlternateLocales() 函數來產生 Alternate 標籤:
---
import { availableAlternateLocales } from '../../i18n/linking'
---

<head>
  {
    availableAlternateLocales(Astro.url.pathname).map(({ locale, href }) => (
      <link rel="alternate" hreflang={locale} href={href} />
    ))
  }
</head>
總結
先說缺點好了,Astro 做多語系雖然有提供了基本的功能,但既不完整,文檔說明並不完全清楚,生態也不夠強大。不過我摸出這套流程出來,目前我自己實作下來算很滿意的,起碼來說我可以比較自由的去拼裝出我要的功能,而不會被一些預設的東西給綁住,這是我最喜歡的部分~

